Friday, 18 September 2009
Forster's Fabulous Friday Fondant
Here, for your delectation and delight, on a flippin' freezin' Friday, is my module 3 work to date. It is in a randomised and reversed order, primarily because I haven't blogged for so long I have forgotten what to do.
3-d shapes - unfortunately these have got a bit squashed so while they did look quite good, they now look like squashed card.
Dyed fabrics - this is the first time I have used procion dyes. My colours for this module are green and pink by the way.
Dyed fibres, looking like luminous spaghetti
Monoprinted papers
My sketches of jewellery:
Preliminary spiral sketches:
Friday, 15 May 2009
Diversions and distractions
There is something about working with just black and white for months on end that makes you go a bit stir crazy when you are finally unleashed back into full blazing, rainbow-hued, glorious technicolour once more. Certainly something, some set of cogs, has clicked over in my head and a lifetime of procrastination has ripped itself to shreds and I just cannot stop making different things.
I want to share some of the bits and bobs I've been playing around with.
1. I've been making more felt. I got a real taste for this while I was working on module two and made some black and white and grey felt. Now I've made some really bright felt ("every action has an equal and opposite reaction").
2. I have been making some cuffs. One is also very colourful, the other two a little quieter. There are two with beads and buttons sewn onto suede. I am especially fond of the really buttony one because it makes a lovely little jangly noise as it moves. The colourful one is very much an experiment. I had something through the post (can't for the life of me recall what it was now) that was protected by a plastic mesh tube. I was idly messing around one day when I put it on my hand ... and realised what a perfect fit it was around my wrist. Yey, an idea was born. So I messed about some more with some recycled sari yarn, and the rest is history. All the pieces of yarn are simply pushed through one hole and back through a neighbouring hole. The biggest problem is that the mesh has stretched a bit with the process of pulling it to insert the pieces of yarn. However, it is fine over the sleeve of a jumper.
3. Dipping Dottie. Now first-up this is not my original design. I signed myself up for a course on the Joggles website. I saw Dottie and really liked the cut of her jib. I'd always fancied having a go at an art doll so this seemed a good opportunity. I think the original design is good - after all that is what caught my eye in the first place. I do however have some reservations about the actual pattern provided to put Dottie together. I could be mistaken but quite a few times I felt that following the given pattern would not result in the intended outcomes in the photographs. Indeed I had to make quite a few pattern adjustments as I went along to get things to work.
It almost felt as though the doll had been designed and then a pattern made retrospectively that wasn't tested to check it would work as it was meant to. Now, I have to point out that quite a few designers work via Joggles and have tutorials that are available for varying amounts of money, and the lesson part of this art doll is not necessarily a good representation of the other tutorials. I've never tried any of the others so I don't have a yardstick to compare it by.
On the basis of Dipping Dottie I would have to conclude I was disappointed in the lessons. For the money you get 4 weekly pdf files so in the end I had maybe 20 - 24 pages of instructions/pattern/photos. There were no videos for this tutorial. For the same money I could have bought 2 or 3 books on making art dolls and ended up with many more pages. So this time round, although I really like the doll design, I didn't feel the lessons were particularly good value for money. I think maybe some of the tutorials with videos would be a different matter, and as I've said a lot of designers work through Joggles, so I can't write them off. That would be the same as going into a sweet shop, tasting one gross sweet and declaring all sweets vile.
Tuesday, 31 March 2009
The bags won't stop!
Finally THE BAG was finished - phew! My daughter has spent the last few weeks asking "when are you going to finish your bag mum?" (with increasing emphasis on the "when" or the "are" depending on levels of frustration and disbelief).
So, with the giant black and white construction sorted out I could give my daughter a bit of time and attention and help her out with her bag. She decided on a whim to go out with her dad and buy some fabric a few weeks ago. The choice was suitably glam - leopard skin and a glorious gold shimmer. The latter is being saved for another project.
We sat down and planned out something fairly simple, lots of straight lines, so that my daughter could - with assistance - operate the sewing machine. And here it is in all it's glory. My daughter loves it and is very proud of the amount she was able to do. Hm, seems to have taken a shine to my sewing machine.
I learnt a lot too. The bag is given its strength by a base of felt throughout. It is lined with black fabric. Most of it worked out fine. There is one little bit I'd do differently next time. 1. I knew I had to make the inner lining slightly smaller but then the top where it joins the outer bag needs to be more or less the same size, otherwise you get a few little wrinkles. Next time I'll adjust it properly as the lining on this bag is a little too small at the top but my daughter seems unbothered by the small pleats. 2. I should have attached the inner lining and the top differently - I confess I was trying to take a short cut to get it done, but I should have turned it all inside out, sewn together leaving a gap, turned and then finished off. That would have looked a little neater. But all in all it still looks pretty good, my daughter loves it and it is a useful bag for her. Job done.
Wednesday, 18 March 2009
Curse you laws of physics! And how I threw away my gusset then rediscovered my big bottom...
THE BAG ... is complete! Ta-da! But not without much weeping and wailing, many trials and tribulations and problems to be solved at every EVERY turn.
Now, let's see, last time I was choosing fabric and how nice to look back at such an innocent moment. The final fabrics chosen were not all my favourites or the ones I thought had worked out best as fabrics. They weren't all the ones I thought I'd use. But I chose the ones that would work best for this bag. One thing I found out throughout the process of making selections is that you discard much more than you choose, and the bits you reject are as important as the things you decide to include. But you all knew that already, so I was just playing catch up.
Every stage of constructing this bag became a puzzle to find a solution to, and then a physical challenge to carry it out. I won't go into the full gory details but just give a few little snapshots so you get the flavour of it. The front, back and sides/bottom had to be constructed out of three layers of already thick felt. My Pfaff felt the pain of trying to stitch the layers together, and I encountered the problem of manouvering a large piece of not very bendy material with limited space between the needle and the main body of the machine. Then the edges had to be sealed together with bonding powder, which sounds simple enough but it took literally hours with a hot iron to get it all sealed successfully. For one thing, thick felt takes a lot longer to bond. Then the edges weren't very smooth or well finished so I then spent some considerable time giving it all a short back and sides with a razor. The rest of it, involving a leather needle and some pliers is too fresh in my mind to relive. Let's just say there was pain and there was blood.
"And then we came to the end " (a book I enjoyed by the way, very funny) and then I came to what I thought was the end, only fate had one more funny little joker to throw onto the table. And this is where the laws of physics (curse you laws of physics!) came in like grouchy aunt Gladys to spoil everyone's fun. The thick piece of felt that was supposed to form the sides and bottom would bend in one direction or the other but not both at once - it needed to bend around the bag but also to curve so that the edges would lie flat to the edges of the front and back to enable it to be sewn together. It refused point blank to do both.
So I did what any girl would do in this sort of situation and got rid of the pesky gusset all together and sewed both front and back directly together, stuck my tongue out at the bag and decided it made a rather lovely and voluptuous seed pod of a bag. Not overly practical but there was something delicious about it all the same.
Well, we all rethink such drastic action and I decided to give it one more go so with my heart in my throat I cut the stitches open and made a new bottom with three layers of thinner felt. And there it is finally, all done and finished, and my husband telling me I'm at a loose end now. It's a bag, it has a big bottom and more history than a bag needs. You could stuff a lot into and probably use it as an item of self defence.
I'm done. Module 3 here I come!
Thursday, 5 March 2009
50th post - luckily and unfortunately
No, not THE BAG yet, although I can report that it is coming on nicely even though it is the most work intensive thing I've ever made. Totally non-commercial, so it will have to fight it's corner under the label of art.
Well, 50 posts that seems worth celebrating with some whimsey. There are many blogs I enjoy reading, and one is "From down the well". Helen posted this a couple of days ago about one of those Google distractions that can be such delicious fun. She had found it on another blog, and so the string goes on through the ether, so I have no idea who thought it up in the first place. It's a thing that can be called "unfortunately ... luckily".
What you do is google the phrase "unfortunately {insert your first name}" and/or "luckily {insert your first name}". You get a strange melange of phrases. I came up with the following:
"Unfortunately Kathryn, the medication you need to treat your seahorse's affliction is a prescription drug
Luckily Kathryn proved adept at improvising with a spoon
Unfortunately, Kathryn was unaware or unbothered by the fact that the Queen is a public figure
Luckily, Kathryn using her 'telepathic powers' summons a school of fish!
Unfortunately, Kathryn was expecting the usual abilities: flying, energy blasts, super-strength and super toughness, possibly enhanced senses"
I thought that was, well, amusing. I'm sure there is someone out there who writes short stories who could make something out of that random selection. Or maybe it is a good basis for a variant on consequences, or one of those barking mad games they play on "I'm sorry I haven't a clue".
So gripping my spoon, ignoring the Queen and hoping that super strength is on form, it's back to the bag then ...
P.S. - the poor seahorse was suffering from bubbles on its tail which sounds ... I was going to say awful, but I'll admit I'm really thinking funny.
Tuesday, 24 February 2009
Fabric selection and this, that and the other
I've tried out a couple of layouts for the bag. First of all the 'sunray and curve'. I photocopied different pieces of fabric to test out how they might look. I think the curve would need to have some sort of pale fringe or border to really highlight and emphasise it.
I tried this for the 'windmill' layout, then decided the big white circles upset the balance, so tried the following alternatives. The one that looks just like a piece of black fabric doesn't show up properly but it is the wrinkly fabric with circles of black /shiny thread.
I could have a different design on each side of the bag.
I made some felt. This is not quite as random as it might sound. I did entertain the idea for a short while of making the base felt for the bag itself. Common sense returned luckily, but then I thought it might be nice to explore some possibilities for extra bits and pieces to attach to the bag - dangly things to add interest and movement.
I also made some felt balls to cut up to make large felt buttons - that was fun. Might have to make some more of those too!
I had some false starts trying to sew up my strippy piece of fabric - last time this was shown just tacked together. I began sewing it together with my machine but it just didn't look right. I considered using curves of stitching but then I didn't want to lose the looseness of the strips or the frayed edges. So I've handsewn using less than tidy stitches, and using the size and colour of the thread to add to the tonal shading.
Last but not least I was looking at the wooden balls that I used when dyeing the black cloth with the white circles - they have taken the dye in places creating an interesting effect and now I'm wondering if I could incorporate them in some way. They'd have to be in some sort of net as they don't have holes through them.
So much to consider....
Wednesday, 11 February 2009
First beauty parade
Here's the main contenders all together for a group photo:
That's over 2 sq m of fabric and me, being me, there is more, primarily similar to the grey tie dye to the top and middle left. Well, you simply cannot have too much fabric (what a ridiculous notion!).
The three black fabrics in the top right section are:
1. A fabric with thick yarn couched on the reverse so that you get the impression of the yarns from the stitching on the right side.
2. One with ordinary thread sewn in many overlapping circles creating a lovely lumpy bumpy surface.
3. Black thread with shiny bits sewn in circles so you get lovely lumps and bumps and some sparkle too.
I've also been doing a bit of felt making for some dangly bits around the bag - more on that another time.
Monday, 9 February 2009
It's nearly time for the auditions
No, I'm not running late for the BAFTA's. I am dragging out this last part of module 2 into a close approximation of what infinity really looks like or eternity really feels like. Well, I'm not trying to do that as some sort of punishment - even if that is what it feels like to you. I'm just showing each and every single step of the way - and the final assessment piece is a long hike up a big hill ... in a howling gale ... with a leaking anorak ... and ... ok you get the picture. And I am rather "over-egging the pudding" as I am really enjoying it now.
It is nearly time to audition all the bits of fabric for possible inclusion in THE BAG. I'm also lining up various 'bits' that might also make it onto the bag in some form, maybe as additions to part of the fabric or as dangly bits.
1. The felt base - I am still trying to source this, but I may be close to finding something. I did at one point find myself imagining that I'd have to make it myself, and then realised that trying to create a huge piece of felt 1cm thick was a bit of a tall order.
2. The fabric.
A lot of stitching later and I decided all that snow had subliminally crept into my head and then out again onto the cloth!
Cloth created from other pieces of dyed cloth torn into strips and arranged into a tonal column of sorts.
And then I went round and round and round in circles ... I wonder what my head was telling me here?
3. The buttons (it is starting to sound like a pantomime)
First all ebay produced some goodies (and you can find these and more at Textile Garden)
Then my experiments bonding felt turned themselves into oversized buttons (4 - 5 cm across and 8mm deep)
Then I played with shrinkles plastic and made these teeny weeny buttons:
the first set are about 0.5 cm across
the second set are about 1cm
Finally I had a rummage through an old box of family buttons
So it is coming together in diverse and tangential ways. Watch this space. More is coming soon .. at a cinema near you ...
Wednesday, 4 February 2009
Another step or two closer...
Apologies to anyone reading this blog who is not my C & G tutor - things must be looking a bit repetitive and dull by now. ("When will she be over this whole black and white thing?!" - trust me I am truly over it, but I still need to finish this module).
Anyway, I am now testing ways of obtaining thicker felt. I am still persisting at trying to build up thick felt from sheets of thinner felt. Here's six sheets sewn together making 6mm felt:
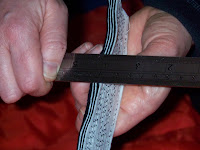
And here are 8 sheets creating 8mm felt (and thanks to my 8 year old daughter for her fabulous photography ... and my thumb is still there really underneath the ruler)
I have been producing more samples to create different tones in the final piece. This is some yarn that has been unravelled periodically.
Trying out a sort of darning effect:
I think this has possibilities - white thread sewn with whip stitch and then whip stitch in the alternate colour way (white underneath in the bobbin on a very loose tension, black thread on the top, normal tension)
This next piece is only the start of another whip stitch experiment. I want to add stitching and thread so that the tone graduates from light to dark down the cloth:
Yet another sample that will have more stitching probably:
I may do something more with this too:
Anyway, I am now testing ways of obtaining thicker felt. I am still persisting at trying to build up thick felt from sheets of thinner felt. Here's six sheets sewn together making 6mm felt:
And here are 8 sheets creating 8mm felt (and thanks to my 8 year old daughter for her fabulous photography ... and my thumb is still there really underneath the ruler)
I have been producing more samples to create different tones in the final piece. This is some yarn that has been unravelled periodically.
Trying out a sort of darning effect:
I think this has possibilities - white thread sewn with whip stitch and then whip stitch in the alternate colour way (white underneath in the bobbin on a very loose tension, black thread on the top, normal tension)
This next piece is only the start of another whip stitch experiment. I want to add stitching and thread so that the tone graduates from light to dark down the cloth:
Yet another sample that will have more stitching probably:
I may do something more with this too:
Subscribe to:
Posts (Atom)