Friday, 30 January 2009

Progress towards the bag

I did a bit more tie dyeing, and some of the better results are below (there were many more pieces of cloth but I won't be boring and show them all):


Then I began to produce some of the heavily textured black cloth that might go into the final design. Both make use of repeated randomly sewn circles to make the fabric pucker:


Finally, Sian has suggested using some heavy duty underlay felt. I decided to experiment with layers of standard craft felt. I made the following box from 3 layers of felt, and it is very sturdy so I think this would do fine:

Zentangles and neo-zentangles

Well, they are irresistable aren't they?


Saturday, 24 January 2009

Nature does zentangles

These pictures could have been taken a couple of mornings ago. Actually it was a year or two back in reality, but seeing similar patterns on my car earlier this week reminded me of those zentangles.


Monday, 19 January 2009

Module 2 - the end is nigh, part 2.

I decided I prefer the fabrics with a strong pattern, and a lot of contrast...

image 1image 2


... and with the stitched and manipulated fabric I like the extreme textures

image 3image 4


So I will try and build my final design from these options.

Then, there were the further designs I did before deciding to alter the shape/length:


image 5image 6


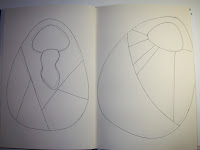
And then I knuckled down and adjusted and redesigned to accommodate the new shape and to try and make sure that none of the pieces ends up either to small to manipulate successfully or too small to contribute to the pattern effectively, and here some possible ideas:

image 7image 8


image 9image 10


And finally I went off on a bit of a tangent and tried alternate bag shapes, and with and without closers.

image 11image 12


Now I guess I need to make some final decisions about which pattern and then make a trial version to test various technical issues.

Module 2 - the end is nigh! part 1

Well, I decided to make myself a list of things that needed to be done to get to a final design for the three dimensional object.
  1. Resolve the issue of the final size of the complete bag, and work backwards to check if the design, textures and patterns would work successfully at that scale (and adjust as necessary).
  2. Narrow down the choice of which dyed and which stitched patterns to use on the final design.
  3. Resolve the technical issues. First of all how to make the bag robust enough, secondly how to make handles that are functional and how to deal with the base of the bag.
  4. Finally, narrow down the design to a final choice and test some of the fabrics to see if there are any unforeseen technical or design issues when it comes to final assembly.
For the final size of the bag I cut out three paper mock ups and posed for photographs :
Too shallow, I think
Too fat (the bag silly!)I think I like this one


Tuesday, 6 January 2009

Bags of beads

Happy New Year!
The one creative pursuit I've managed to indulge in since Christmas has been beading (like many others I lose my sewing room over Christmas as it converts to its temporary life as a dining room, so whatever I do at Christmas has to be small and portable). Here are some pictures of the results:

Two big, fat juicy beads, one on a simple string of recycled sari silk and the other on a ribbon choker. On the right, some one and half inch tortoise shell ovals set off by some 'gold' beads; tiny red and silver beads on bright blue thong; and pink pony beads on a triple strand of suede and ribbons.


Below, the big piece of work which was an experiment in chevron chain beading. I had some problems with the thread and in the end tried reinforcing things with a thin piece of wire. I think it makes a little too stiff but it was a useful test. I got the basic pattern and guidance from a superb book called "The art and elegance of Beadweaving". It covers chevron chain, crocheted ropes, herringbone stitch, peyote stitch and spiral rope, and is carefully detailed so you can follow projects or adapt your own. There is also a fabulous selection of amazing beadwork to drool over. The second picture below shows three dark necklaces that could be worn singly or all together. They are a mix of black shiny seed beads and dark maroony purple chips, lighter purple chips and red ovals, all with gold seed beads.


Here the pinky orange necklaces are also designed to be worn either separately or together.


So, can't say I'm short of a necklace or two now can I?